Fix Dell Laptop Black Screen After Bios Update
Encountering a black screen after a BIOS update on a Dell laptop can be quite a shock. While BIOS updates are intended to enhance system functionality, unforeseen issues may arise, leaving users with an unresponsive display or even unable to boot to the desktop.
In this article, I’ll explore practical solutions and a step-by-step guide to resolve the problem of a Dell laptop black screen after a BIOS update. I faced this issue recently when updating the XPS 15 7590 bios version, but these tips can be applied to most Dell laptop updates and laptop models.
Why do I get a Dell laptop black screen after BIOS updates?
There are a number of reasons why this issue may occur. Not every problem will be the same for you and some can overlap, but these are the most common:
Interrupted Update – The most common reason a BIOS update can cause a black screen is that the update itself was interrupted in some way. However, because the BIOS is integral for the laptop to function, you must take extra steps to reinstall it.
Power Supply Problems – Laptop’s can be finicky when it comes to power and charge. If your battery is on low charge or the power adapter is connected but not working correctly, it can cause the update to fail and result in a black screen error.
BitLocker Conflicts – There is a known conflict with BitLocker that interferes with BIOS updates.
Malware – Viruses and malware that are laying dormant on Windows can target the bios and important system files, resulting in failed BIOS updates and other problems.
Windows Corruption – If your Windows system is already corrupted and suffering from damaged or missing files, this can interfere with BIOS updates.
Outdated Drivers – The most common conflict between drivers and the BIOS comes from outdated display adapters, which are responsible for processing all the graphics on screen. This can lead to a black screen when the Windows desktop loads.
Dell Laptop Black Screen After Bios Update: 7 Quick Fixes
Before you immediately jump to a factory reset, these methods will help 99% of users get their system working again without losing data.
1. Perform a Hard Shutdown
Performing a hard shutdown removes any residual power problems and allows you to reboot clean.
1. To do a hard shutdown on a Dell laptop, hold down the power button for at least 15 seconds. This powers off the laptop completely.
2. Leave it for a few minutes, then turn it back on and check if the problem persists.
2. Remove all External Devices
If the problem persists, perform another shut down, but this time:
1. Remove the power adapter, battery if it unclips, and any external devices like USB drives and peripherals.
2. Let the laptop cool for a few minutes, reconnect the battery and power adapter if needed.
3. Update Drivers
If you get to this stage and can load the desktop, you will be back on the old BIOS. From here it is a good time to update your drivers, which may be conflicting with the update.
1. Use your hardware’s software utility to check for driver updates. E.g., NVIDIA’s GeForce Experience. Alternatively, download them from the official sites. Dell’s official page is here. These will often install automatically. If not, use Device Manager.
2. Type Device Manager in the start menu search bar and open it.
3. Pay special attention to exclamation warnings beside devices,which indicate a driver needs updating.
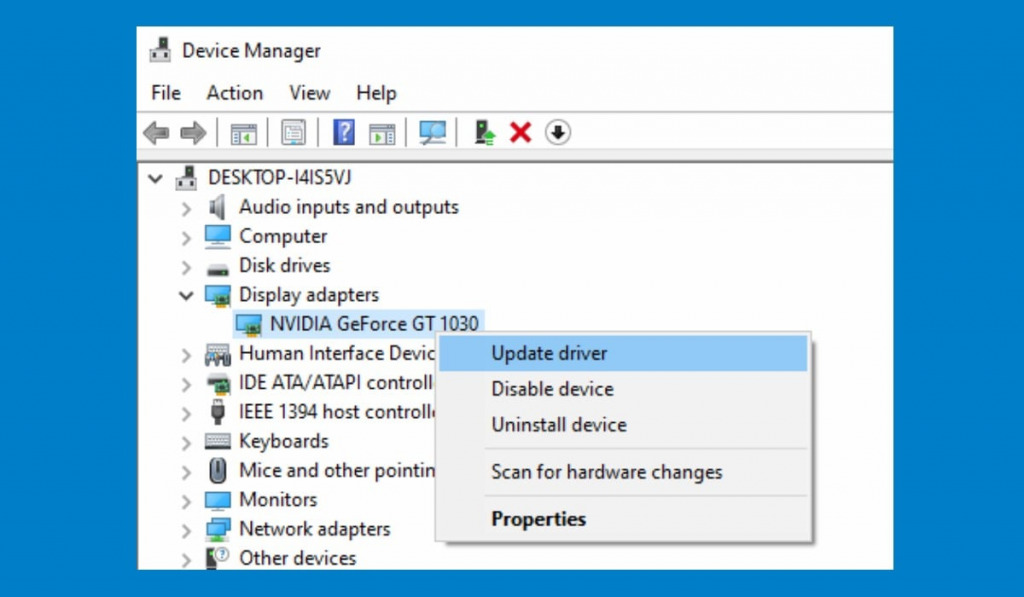
4. Right click on a device and select Update Driver.
5. Follow the prompts and browse to the driver files you downloaded.
4. Scan for Malware
Whenever you get a laptop problem, it’s a good idea to perform a full system Malware scan using Windows Virus & threat protection or a reputable third-party antivirus. Make sure to include any external drives that may be harboring viruses too.
5. Update Windows
It’s also a good time to make sure Windows has all the latest security and bug patches before attempting to update to the new BIOS version. If a previous Windows update failed, this could have caused system corruption, which may also contribute to the black screen error.
6. Use the Fortect
Fortect is a comprehensive Windows repair tool that detects corrupted or missing system files and Windows registry issues. It will bring your system back to optimal condition, so the BIOS update is more likely to succeed.
1. Download and Install Fortect on your Dell laptop.
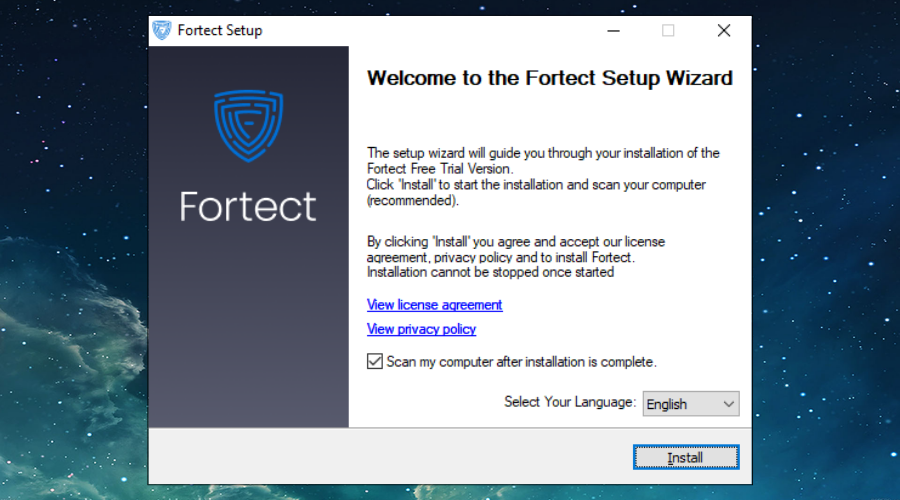
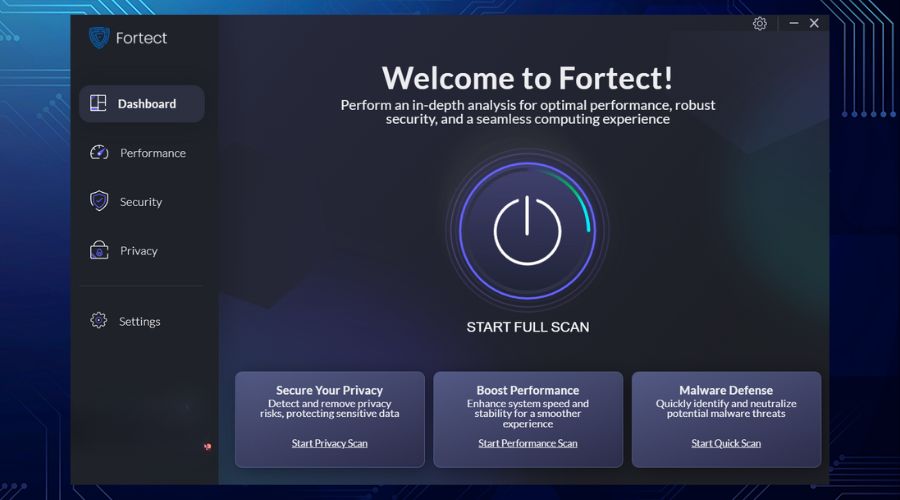
2. Open the software and click the scan button.
3. Once complete, Click Start Repair and it will automatically repair Windows and registry values using clean copies from its repository.
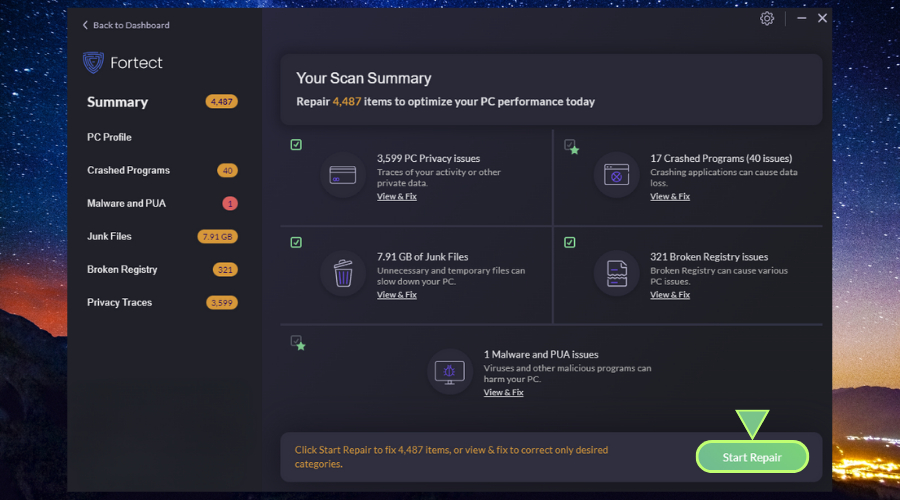
Fortect also removes junk files and temporary Windows files that may be consuming space on your hard drive.
7. Safe Mode and Advanced Boot Options
If at any point your Dell laptop still doesn’t load the desktop or goes to the black screen before you can apply the above methods, you can boot in Safe Mode or access Windows repair features via the Command Prompt.
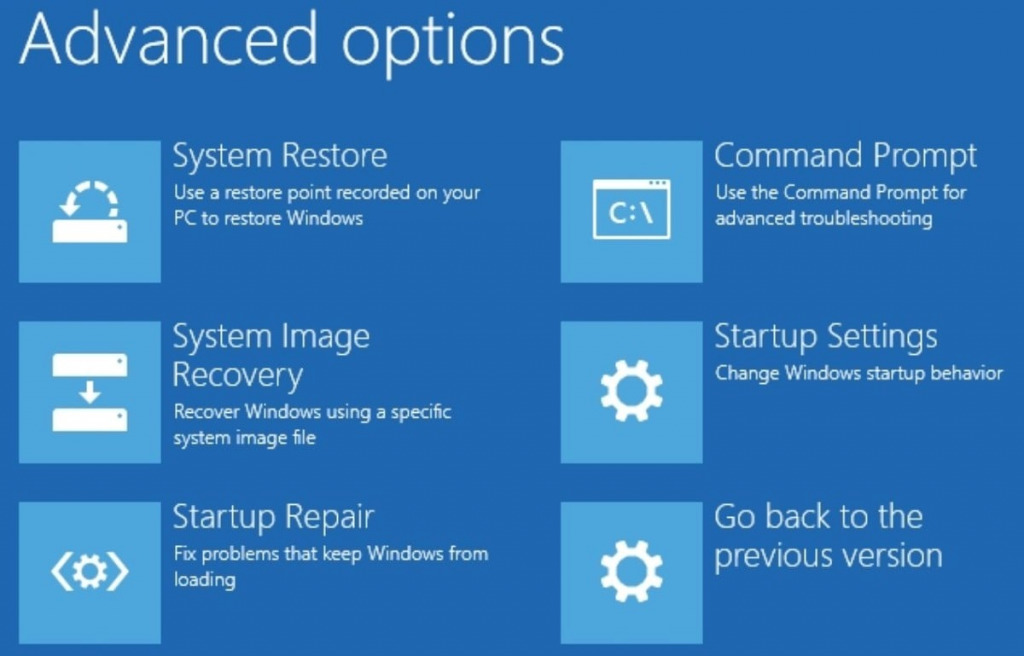
1. Reboot your laptop and depending on the model, you need to press the F8, F2, or F12 key. Tap and hold the key continuously so it registers and enters Advanced Boot Options.
2. Follow the prompts to find your desired options.
3. Startup Repair will attempt to fix problems with booting to the desktop.
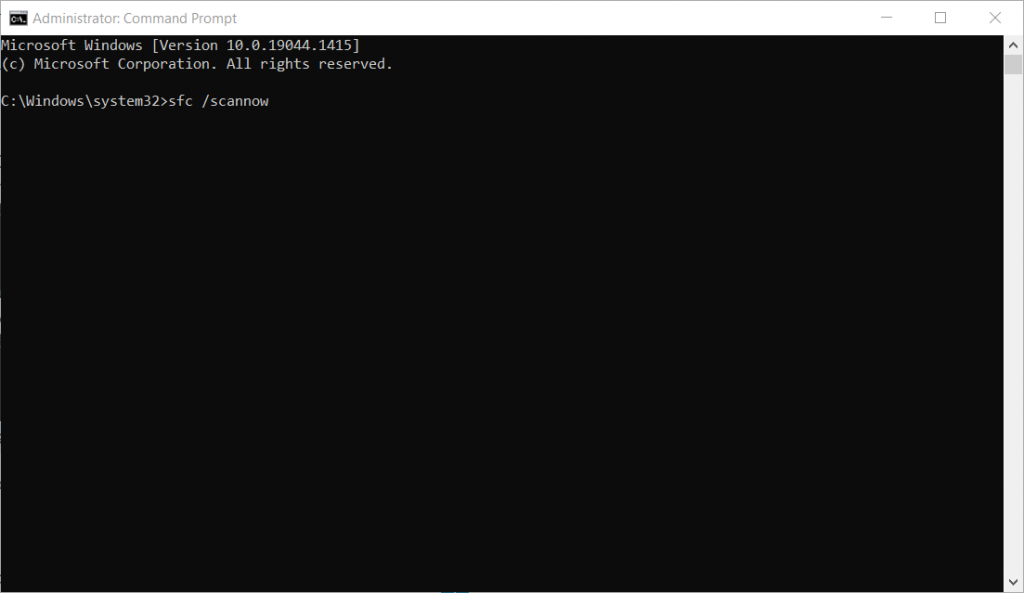
4. Command Prompt allows you to run the System File Checker. Simply type SFC /scannow and press Enter.
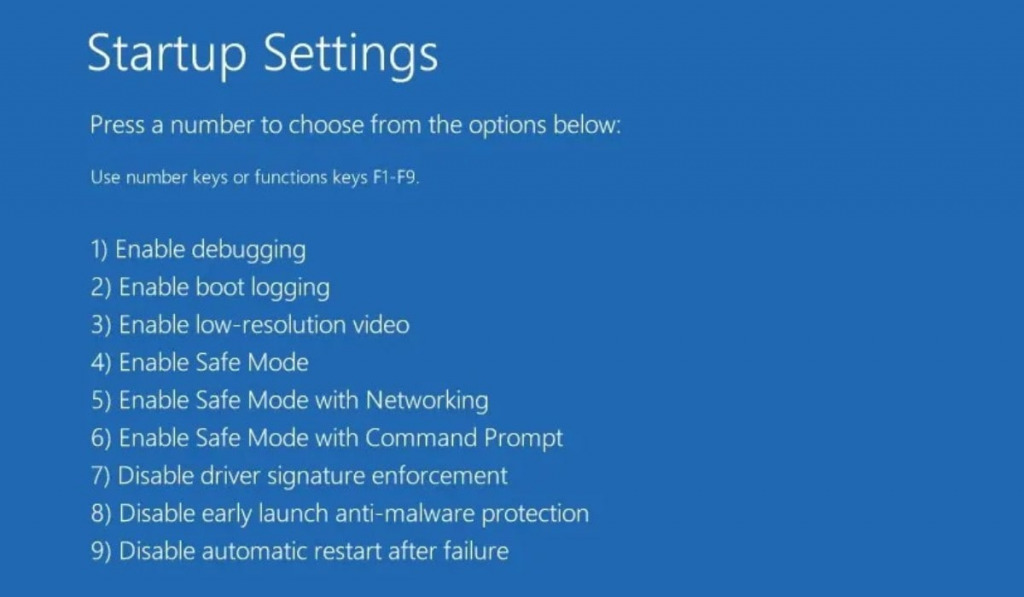
5. Safe Mode gets you to the desktop with limited drivers and processes running so you can update drivers, run Fortect, and apply other fixes without the black screen occurring.
Final tips when you get a dell laptop black screen after bios update
At this stage the black screen error should be solved and it’s safe to update the BIOS to the latest version. If you use BitLocker, make sure this is turned off before proceeding.
Although a black screen can be frustrating, it does not mean your laptop is broken. By following the above steps you’ll have it back running smoothly with all the latest updates in no time.


