
How to Fix Memory Leaks on Windows 10
Memory leaks in Windows 10 can be frustrating, leading to slow performance, system crashes, or even application freezing. Fortunately, various troubleshooting methods can fix memory leaks.
We will walk you through the steps to identify and resolve memory leaks in your Windows 10 system.
What is a Memory Leak?
A memory leak occurs when a program or system continues consuming memory without releasing it after it’s no longer needed. This problem can degrade your computer’s performance, eventually making it run out of memory. Programs may become sluggish, and you might experience system crashes.
Common Causes of Memory Leaks in Windows 10
Memory leaks can be caused by several factors, including faulty software, outdated drivers, or misconfigured system settings. It can also result from running too many resource-intensive programs simultaneously.
9 Ways to Fix Memory Leaks in Windows 10
Scan for Malware and Viruses
Malicious software can often cause memory leaks by running hidden processes in the background, consuming your system’s resources. Scanning for malware is an essential first step in troubleshooting memory leaks.
- Install a reliable antivirus program or use Windows Defender.
- Run a full system scan.
- If any threats are detected, follow the prompts to remove them.
Or, consider investing in a third-party PC solution like Fortect, which offers advanced malware scanning and defense. Once installed, Fortect Premium automatically scans your Windows PC for issues like memory leaks and other threats. It detects and resolves these problems, providing real-time updates while optimizing your system for peak performance.
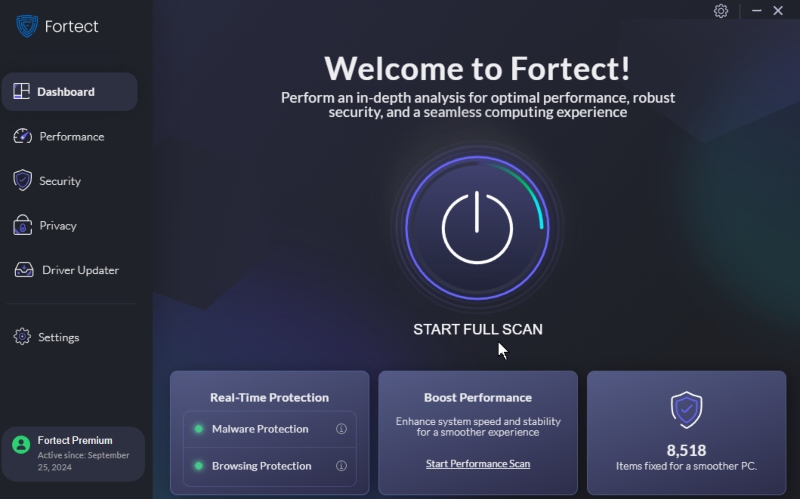
Download and install Fortect now.
Update Windows and Drivers
Outdated Windows versions or drivers can lead to memory leaks. Keeping your system updated ensures you have the latest patches and optimizations.
- Go to Settings > Update & Security > Windows Update.
- Click Check for Updates and install any available updates.
- To update drivers, right-click on Start > Device Manager, find outdated drivers, right-click, and choose Update Driver.
Close Unnecessary Background Processes
Many programs run in the background without your awareness, consuming memory unnecessarily. Closing these programs can free up valuable system resources.

- Press Ctrl+Shift+Esc to open the Task Manager.
- Under the Processes tab, look for programs using large amounts of memory.
- Right-click the unnecessary processes and select End Task.
Disable Startup Programs
Too many startup programs can slow down your computer and contribute to memory leaks. Disabling unnecessary programs from starting automatically can prevent this.
- Open Task Manager by pressing Ctrl+Shift+Esc.
- Go to the Startup tab.
- Right-click and turn off non-essential programs.
Adjust Virtual Memory Settings
Windows uses virtual memory as a temporary extension of RAM. Misconfigured virtual memory settings can contribute to memory leaks. Adjusting these settings can help improve performance.
- Right-click This PC and select Properties.
- Click on Advanced system settings > Settings under Performance.
- Select the Advanced tab and click Change under Virtual Memory.
- Uncheck Automatically manage paging file size for all drives.
- You can set a custom size for virtual memory based on your RAM (usually 1.5 to 2 times the amount of physical RAM).
Run Windows Memory Diagnostic Tool
Faulty RAM can cause memory leaks. The Windows Memory Diagnostic Tool helps identify memory issues related to your system’s physical RAM.

- Press Windows + R to open the Run dialog.
- Type mdsched.exe and press Enter.
- Choose Restart now and check for problems.
- After the Restart, Windows will run the diagnostic tool and display the results.
Disable Superfetch (SysMain) Service
Superfetch, also known as SysMain, is a Windows feature that improves system performance by preloading apps into memory. However, it can cause memory leaks in some cases.
- Press Windows + R type services. msc, and press Enter.
- Scroll down to SysMain or Superfetch.
- Right-click and select Stop.
Uninstall Problematic Programs
If you suspect a specific program is causing the memory leak, try uninstalling it to see if the issue persists.
- Go to Settings > Apps.
- Locate the program you believe is causing issues.
- Could you select it and click Uninstall?
Perform a Clean Boot
A clean boot starts Windows with only essential services and programs. This can help identify if third-party software is causing memory leaks.

- Press Windows + R, type msconfig, and press Enter.
- Under the Services tab, check Hide all Microsoft services and click Disable all.
- Go to the Startup tab and click Open Task Manager.
- Turn off all startup programs.
- Restart your computer.
Conclusion
Memory leaks in Windows 10 can negatively impact your system’s performance, but you can identify and resolve the issue with these troubleshooting methods. From scanning for malware to adjusting virtual memory settings, these steps will help optimize your PC and prevent future memory leaks.
If the problem persists, consider seeking professional assistance or performing a fresh installation of Windows.


