How to Fix Windows 11 Snipping Tool not Working
The “Windows 11 Snipping Tool not Working” issue frustrates many users. The Snipping Tool is a handy utility in Windows that allows users to capture screenshots of any selected area on their screen. However, some Windows 11 users have reported issues where the Snipping Tool fails to launch or encounters errors while capturing screenshots.
We will look at various methods to help you fix this issue and get the tool running smoothly again.
What is a Snipping Tool

The Snipping Tool is a built-in utility in Windows that allows users to capture screenshots of any selected area on their screen. It is a convenient tool for taking quick snapshots of specific portions of the screen, whether for documentation, troubleshooting, or sharing information with others.
Causes of Windows 11 Snipping Tool not Working
There could be several reasons why the Snipping Tool is not working correctly on your Windows 11 computer. Some common causes include:
- Corrupted system files
- Outdated or missing drivers
- Interference from third-party applications or malware
- Temporary glitches or bugs in the operating system
- Windows outdated.
How to Fix Windows 11 Snipping Tool not Working
Update Windows
Check for Windows or make sure that your Windows is up to date.
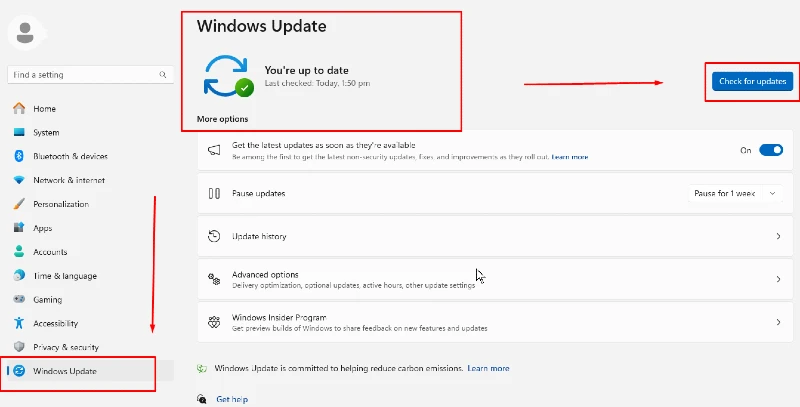
Go to Settings by typing Settings in the search bar next to the Start button.
Click on Windows Update, which is located at the bottom left of your screen.
Ensure you’re up to date; if you still need to, click on check for updates, install available updates, and restart your PC
Turn off Focus Assist
Focus Assist helps users minimize distractions by preventing unnecessary apps from launching and blocking notifications. However, this feature also disables the Snipping Tool.
To disable Focus Assist, follow these steps:
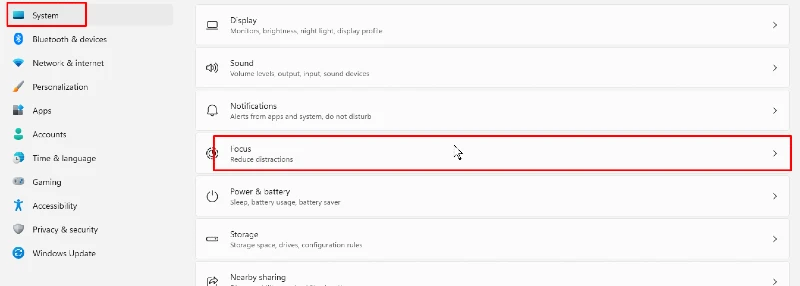
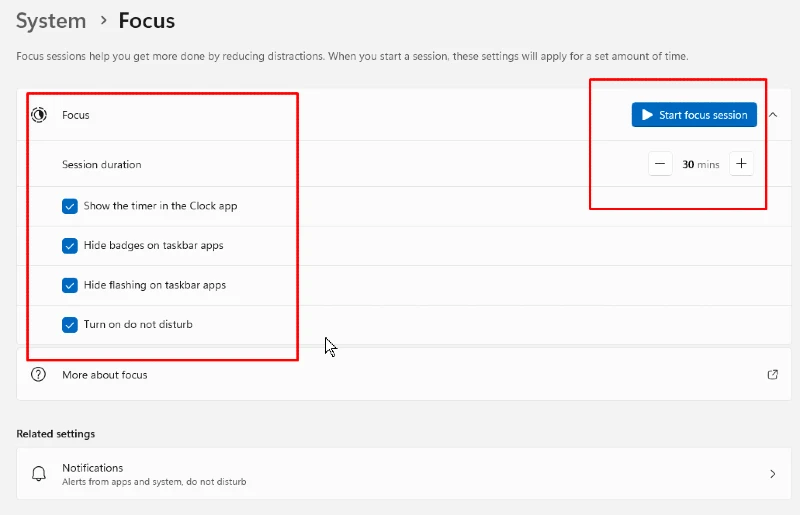
Open the Start menu and select Settings.
In the Settings window, click on System and then Focus Assist.
You can turn off Focus Assist completely or select Priority Only and customize your priority list.
To customize, click on + Add an app and add Snipping Tool to enable it while Focus Assist is active.
Run System File Checker (SFC) and DISM
- Press the Windows key + R to open the Run dialog box.
- Type “cmd” (without quotes) and press Ctrl + Shift + Enter to open an elevated Command Prompt.
- In the Command Prompt window, type the following command and press Enter:
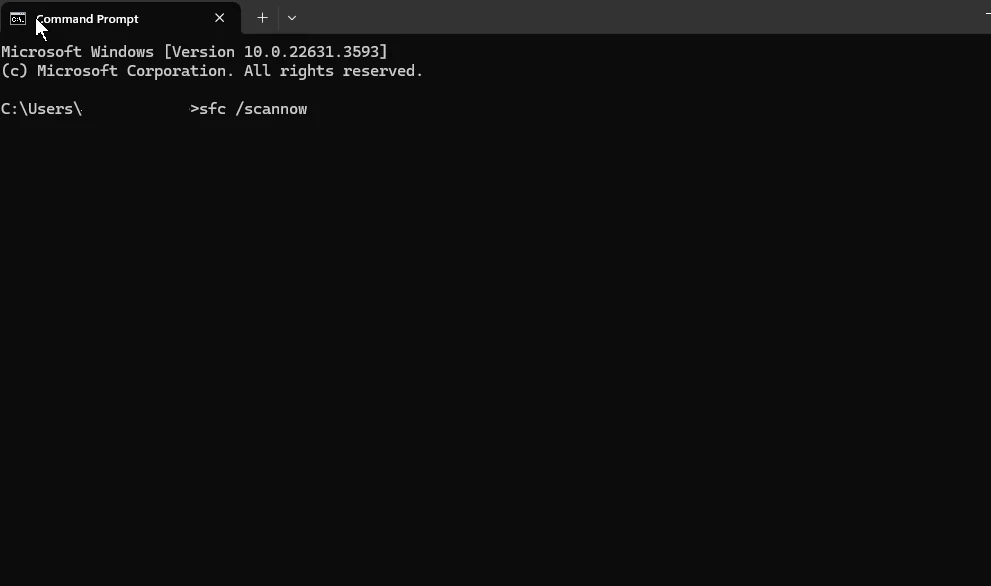

This method will scan for and repair any corrupted system files. Ensure you are the administrator of your computer to perform this task. If not, you have to contact your IT or your computer manufacturer.
- After the scan is complete, type the following command and press Enter:

This process will use the Deployment Image Servicing and Management (DISM) tool to repair corrupted Windows components.
- Restart your computer and try opening the Snipping Tool again.
Reset Snipping Tool
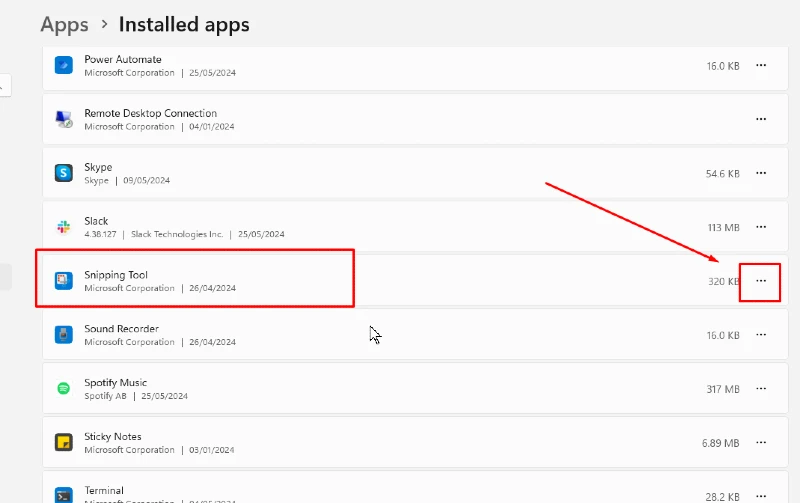
- Go to Settings > Apps > Installed apps.
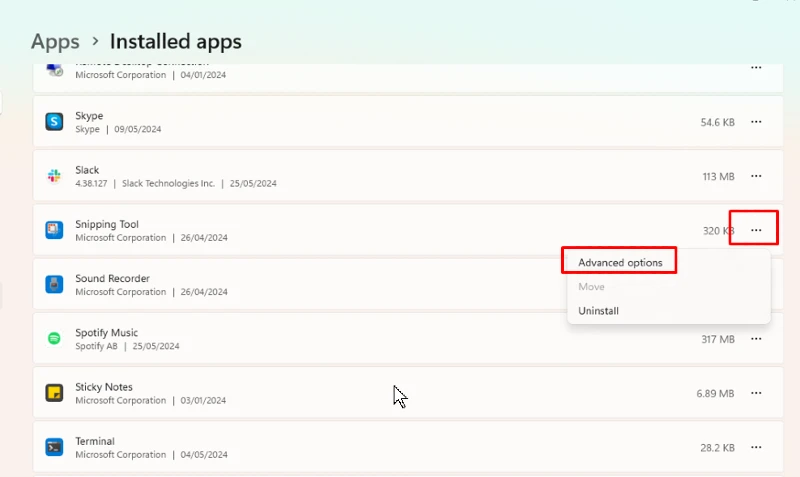
- Find “Snipping Tool” in the list, click the three-dot menu next to it, and select “Advanced options.”
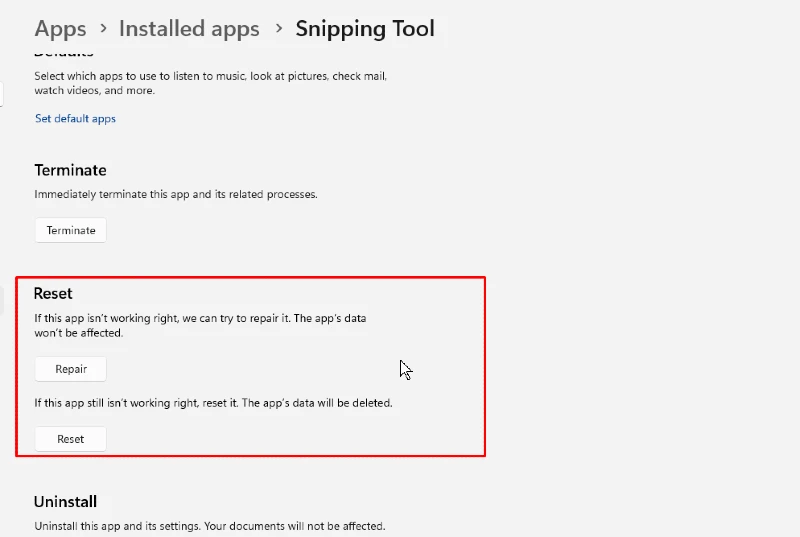
- On the next screen, click “Reset” and confirm by clicking “Reset” again.
- Wait for Windows to reset the Snipping Tool to its default settings.
- After the reset, try opening the Snipping Tool again.
Leverage Fortect’s Stability and Repair Capabilities
If you’re encountering issues with the Snipping Tool not working on your Windows system, a third-party stability and repair capabilities solution like Fortect can help resolve the problem.
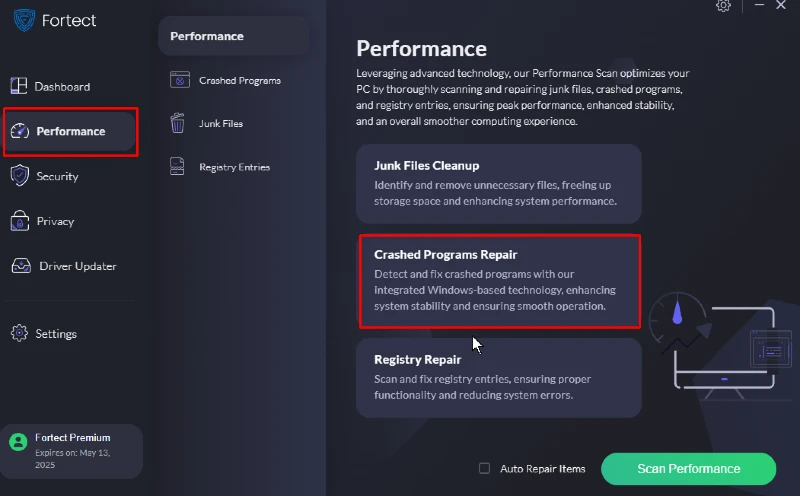
Fortect can detect and repair any instability causing the Snipping Tool to malfunction by maintaining overall system stability across hardware, security, and performance. Computers often face various stability challenges with continued use, leading to system freezes and other issues.
Fortect’s diagnostic tools can identify and fix these stability problems, ensuring the Snipping Tool and other applications run smoothly on your Windows system.
Its malware removal capabilities can detect and eliminate any malware, viruses, or other threats causing conflicts with the Snipping Tool’s functionality.
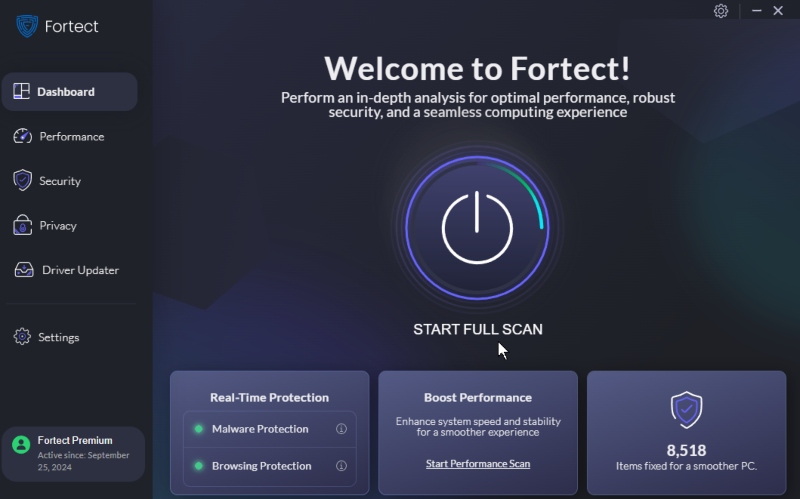
Fortect’s premium plan can diagnose and repair system stability issues that could prevent the Snipping Tool from operating correctly. Its advanced protection, scanning, and repair features can identify and fix the underlying causes of the Tool’s non-operation, whether related to malware infections or system instability.
By utilizing Fortect’s comprehensive tools, you can get the Snipping Tool up and running smoothly again on your Windows PC.
You can download and install Fortect to ensure your PC is running smoothly.
Uninstall and Reinstall the Snipping Tool
If the previous solutions are not working, try uninstalling and reinstalling the Snipping Tool.
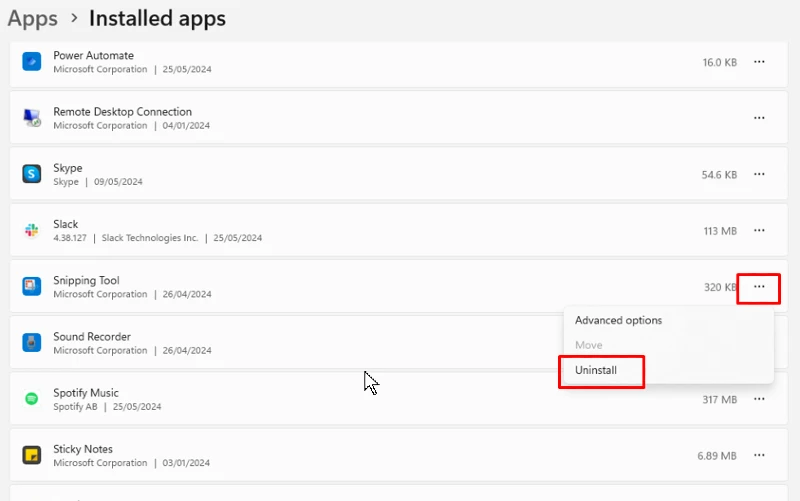
Go to Windows Settings > Apps & Features, find the Snipping Tool, click on the three-dotted lines, right-click, and click “Uninstall.” After uninstalling, download the latest version from the Microsoft Store and install it again.
This fresh reinstallation can sometimes resolve persistent issues.
Conclusion
If you’ve tried all the methods mentioned above and the Snipping Tool still isn’t working on your Windows 11 computer, consider seeking professional assistance or contacting Microsoft Support for further troubleshooting. Maintaining a secure and well-performing PC is essential; tools like Fortect can help you achieve that goal.


