
How to Free up Disk Space in Windows 10/11
Free up disk space in Windows 10/11 for optimal performance, where system updates and applications continuously consume storage. Low disk space can lead to many problems, including slow performance, frequent crashes, and system errors. We don’t want that to happen, don’t we?
This straightforward guide on how to free up disk space in Windows 10 and 11 ensures your system runs smoothly and efficiently. We will look at various methods, including managing drivers and memory storage, configuring Storage Sense, using Disk Cleanup, uninstalling non-essential applications, and more.
6 Steps to Free up Disk Space in Windows 10/11
1. Manage Drivers and Memory Storage
Drivers are essential software components that enable your hardware to communicate with your operating system. Over time, your system may accumulate unnecessary or outdated drivers, which can take up significant disk space. You can free up space and improve system performance by managing these drivers.
Steps to Uninstall Unnecessary or Outdated Drivers
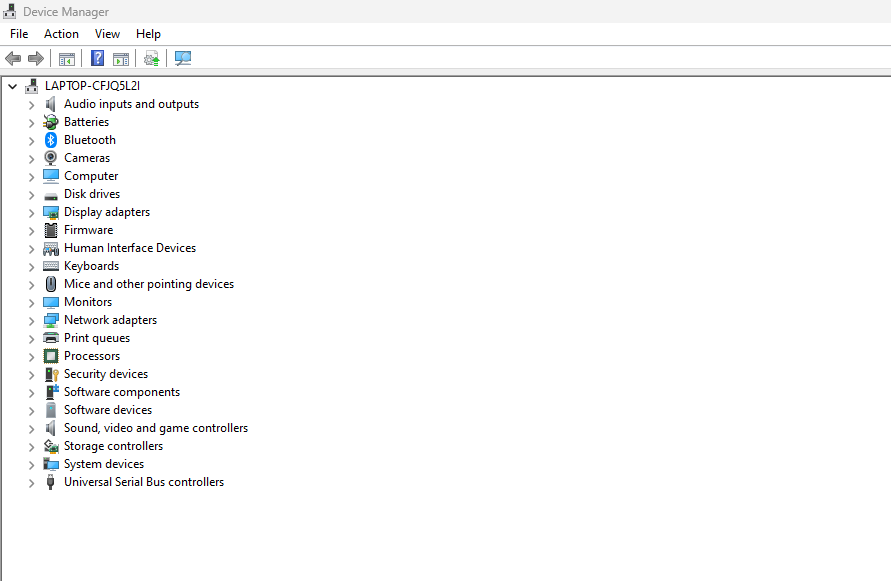
- Open Device Manager: Right-click the Start button and select “Device Manager.” Or, right after the start button, type “Device Manager”.
- Identify Unused Drivers: Look for drivers no longer needed, such as those for old printers or hardware you no longer use.
- Uninstall Drivers: Right-click on the driver and select “Uninstall device.” Follow the prompts to remove the driver.
Managing Virtual Memory (Paging File) Settings
Virtual memory, or the paging file, is a file on your hard drive that Windows uses as RAM. Managing its size can free up disk space.
- Open System Settings: Right-click on “This PC” and select “Properties.”
- Advanced System Settings: Click “Advanced system settings” and go to the “Advanced” tab.
- Performance Settings: Click on “Settings” under the Performance section.
- Adjust Virtual Memory: Go to the “Advanced” tab and click “Change” under Virtual Memory. You can manage the paging file size or move it to another drive.
2. Configure Storage Sense
Storage Sense is a built-in feature in Windows 10 and 11 that automatically frees up space by removing unnecessary files, such as temporary files and items in the recycle bin.
Enabling Storage Sense and Its Benefits
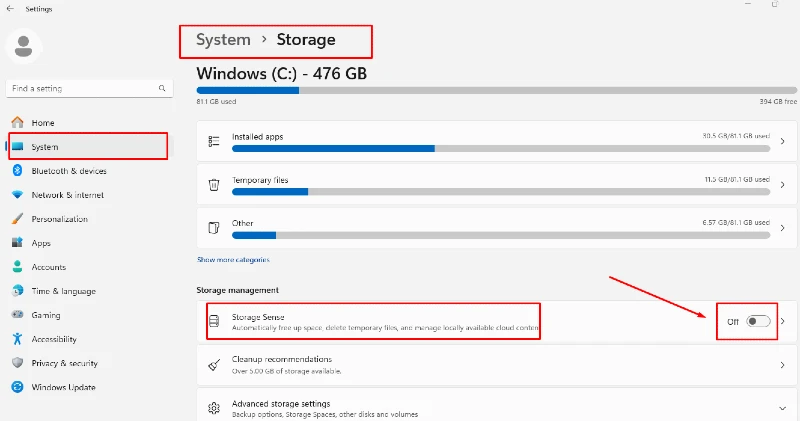
- Open Settings: Press Win + I to open Settings.
- Go to System: Navigate to “System” and then “Storage.”
- Enable Storage Sense: Turn on the toggle switch or the radio button next to Storage Sense or below it.
Configuring Storage Sense Settings and Clean up Schedules
You can customize how Storage Sense works to suit your needs.
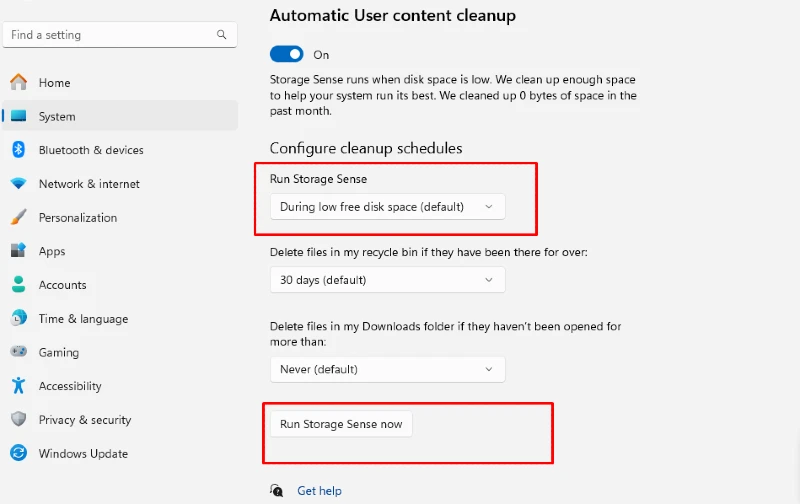
- Configure Cleanup Schedules: After enabling the radio button, click Storage Sense. Right under the Run Storage Sense, you’ll see a dropdown list of the schedules: Everyday, Every week, Every Month. Once you select your schedule, click “Run Storage Sense Now.”
- Select File Types: Choose which files you want Storage Sense to delete automatically, such as temporary files, files in the recycle bin, and files in the Downloads folder.
- Setting up automatic cleanup schedules: You can ensure your system regularly frees space without manual intervention.
3. Delete Files with Cleanup Recommendations
Disk Cleanup is a valuable tool that helps you remove unnecessary files from your computer.
By setting up automatic cleanup schedules, you can ensure your system regularly frees space without manual intervention.
- Open Disk Cleanup: Type “Disk Cleanup” in the search bar and select the tool.
- Select Drive: Choose the drive you want to clean (typically, this is the C: drive).
- Analyze Disk Space: Disk Cleanup will analyze the selected drive and present a list of file types.
- Select Files: Check the boxes next to the file types you want to delete.
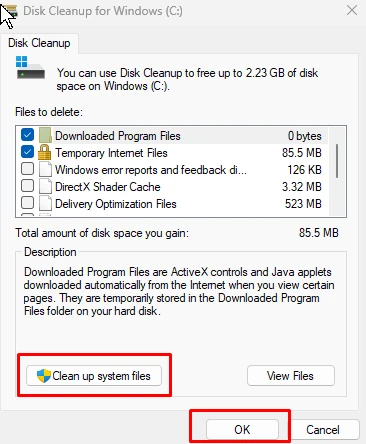
Running the Disk Cleanup Process
- Clean Up System Files: Click “Clean up system files” to remove more extensive and less apparent files.
- Confirm Deletion: Click “OK” to delete the selected files.
Reviewing the Results and Freeing Up Additional Space
After running Disk Cleanup, review the amount of space freed and repeat the process if necessary for other drives.
4. Uninstall Non-essential Applications
Only used or necessary applications can take up significant disk space.
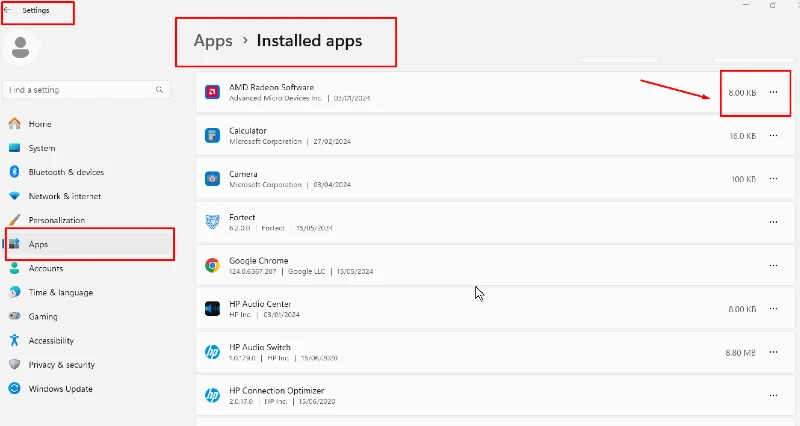
- Open Settings: Go to Settings > Apps > Apps & features.
- Review Installed Applications: Scroll through the list and identify apps you no longer need.
- Right-click on the application you want to uninstall, and you’ll see the “Uninstall option; choose that. You’ll also see three dotted lines following the app you want to uninstall; click on that to select “Uninstall.”
Removing Leftover Files, Junk, and Registry
After uninstalling applications, there may still be leftover files or registry entries.
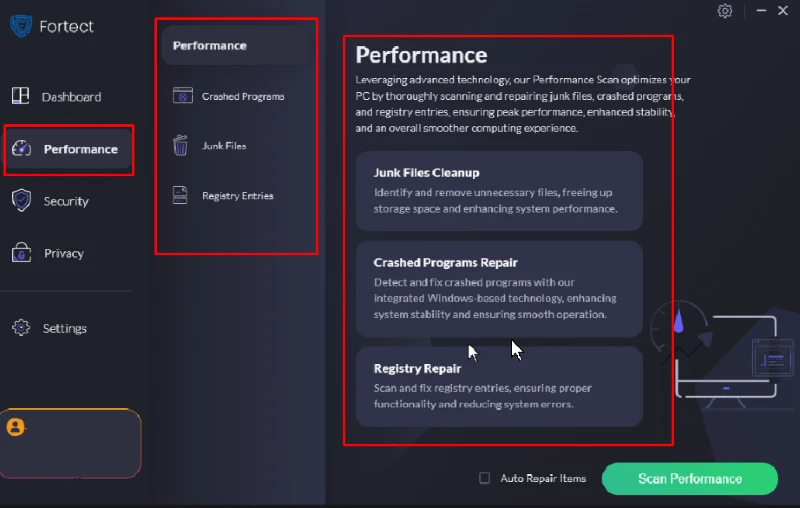
A third-party tool like Fortect can make the whole process easier and automate finding and deleting temporary files, ensuring a thorough cleanup. This all-in-one solution scans your entire computer, optimizes the registry, and performs a comprehensive sweep with your permission. The premier free diagnostic tool detects and fixes Windows system issues regardless of the cause.
It removes junk files, resolves registry issues to free up space, and scans for and removes malware or viruses that may slow down your computer.
- Use Third-Party Tools: Remove leftover files and registry entries thoroughly.
- Manual Cleanup: Check the Program Files and AppData folders for any remaining files.
Download and Install Fortect on your computer to speed up this clean-up and quickly return to your regular browsing routine with ease.
5. Files Protection and Management
Importance of Backups Before Uninstalling Applications
Before making significant changes, it’s essential to back up your data to avoid any loss.
- Create a Backup: Use Windows Backup or a third-party tool to create a backup of your important files.
- System Restore Point: Create a system restore point to revert changes.
Using System Restore to Revert Changes if Needed
If something goes wrong, you can use System Restore to revert your system to a previous state.
- Open System Restore. Type “System Restore” in the search bar and select “Create a restore point.”
- Restore: Choose a restore point and follow the prompts to revert changes.
6. Remove Temporary Files
Applications are for short-term use, and temporary files are created. Over time, these can accumulate and take up significant space.
How to Locate and Delete Temporary Files Manually
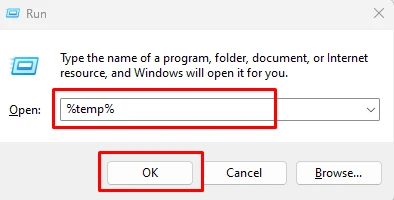
- Access Temp Folder: Press Win + R on your keyboard altogether, type %temp%, and press Enter or click OK.
- Delete Files: Select all files in the Temp folder and delete them.
System Temporary Files
Temporary files created by the operating system can also be deleted.
- Open Disk Cleanup: Use Disk Cleanup to remove system temporary files.
Browser Temporary Files
Web browsers store temporary files which can be deleted to free up space.
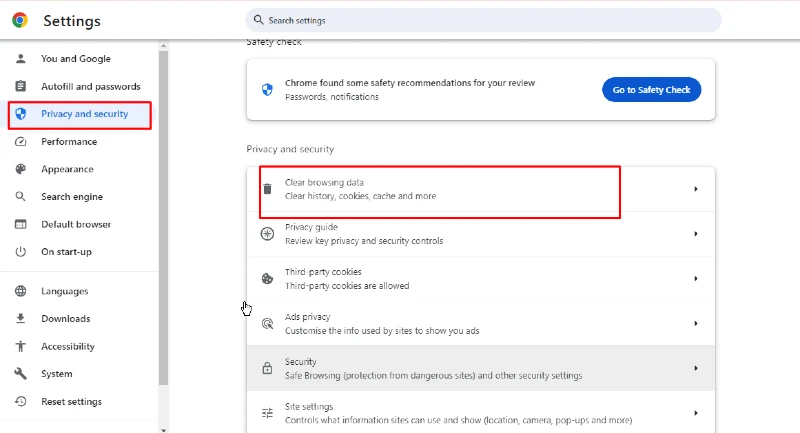
- Clear Browser Cache: Open a new window, click on the three-dotted vertical lines in the upper right-hand corner of your current page, then scroll down to Settings.
- Select Privacy and Security and select Clear browsing data.
Application Temporary Files
Applications may create temporary files that can be deleted.
- Check App Settings: Find options to clear temporary files within application settings.
Using Third-Party Tools for Temporary File Cleanup
Third-party tools like Fortect can automate finding and deleting temporary files, ensuring a thorough cleanup.
Configuring Windows to Delete Temporary Files Automatically
- Use Storage Sense: Configure Storage Sense to delete temporary files automatically.
- Settings: Go to Settings > System > Storage and enable automatic cleanup of temporary files.
Additional Tips to Clean Up Disk Space in Windows 10/11
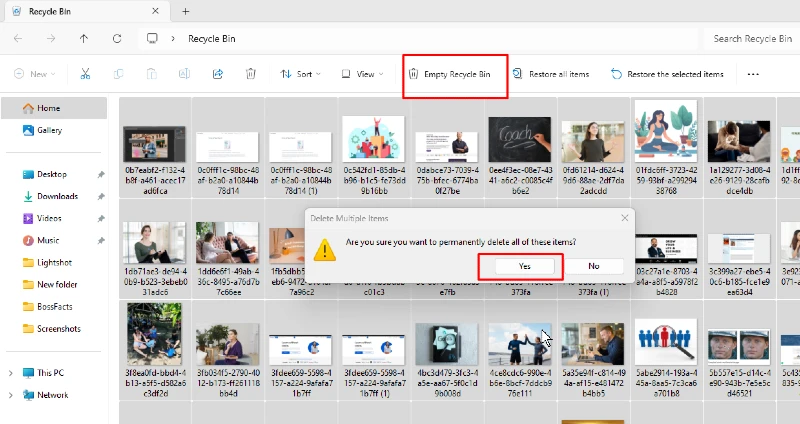
- Emptying the Recycle Bin: Regularly emptying the Recycle Bin can free up disk space.
- Go to your Windows background, click Recycle Bin, or type Recycle Bin from the start menu search field.
- Select Empty Recycle Bin, then click on Yes or OK.
- Compressing Files and Folders: Compressing large files and folders can save disk space.
Right-click File/Folder: Select “Properties” and then “Advanced.”
Enable Compression: Check “Compress contents to save disk space.”
- Disabling Hibernation or Removing Hibernation Files: Disabling hibernation can free up significant space by removing the hibernation file.
Open Command Prompt: Run as administrator.
Disable Hibernation: Type powercfg -h off and press Enter.
- Moving Files to External Storage or Cloud Services: Consider moving large files to an external or cloud storage to free up space on your internal drive.
Use External Drives: Transfer files to an external USB or hard drive.
Cloud Services: Use services like OneDrive or Google Drive.
- Regularly Maintaining and Optimizing Disk Space: Regular maintenance can help keep your system running smoothly.
Set Reminders: Schedule regular cleanup tasks.
Optimize Drives: Use Windows’ built-in defragmentation tool.
Conclusion
Maintaining adequate disk space is crucial for the smooth operation of your Windows 10/11 system. You can ensure your system remains efficient and clutter-free by managing drivers, configuring Storage Sense, using Disk Cleanup, uninstalling non-essential applications, and regularly deleting temporary files.
Periodically freeing up disk space helps prevent performance issues and keeps your computer running smoothly. Implement these techniques as needed and consider using tools like Fortect for comprehensive system maintenance. You can enjoy a faster, more reliable computing experience by staying proactive.


