
How to Fix Time Synchronization Failed on Windows
Time synchronization failed on Windows is crucial for various system processes, security protocols, and applications on your Windows PC. If your system clock is out of sync, it can cause problems with logging into accounts, accessing websites, or even running specific programs.
If you receive the “Time Synchronization Failed” error on Windows, this guide will help you troubleshoot and resolve the issue.
Common Causes of Time Synchronization Issues
Before diving into the solutions, it’s essential to understand the common causes behind time synchronization failure:
- Incorrect Time Zone Settings: Sometimes, the time zone is set incorrectly, leading to a mismatch in time synchronization.
- Windows Time Service Issues: The Windows Time service might be disabled or malfunctioning.
- Outdated System Drivers: Outdated or corrupted drivers can interfere with system processes, including time synchronization.
- Network Connection Problems: Time synchronization requires an internet connection to communicate with time servers.
- Corrupted System Files: System file corruption can prevent proper synchronization.
8 Ways to Fix Time Synchronization Failed Error
Check and Correct Time Zone Settings
A wrong time zone can cause your computer’s clock to show the wrong time, leading to synchronization errors.

- Open the Settings app (press Windows + I).
- Go to Time & Language > Date & Time.
- Toggle off Set time zone automatically, then select the correct time zone from the dropdown menu.
- Turn on Set time automatically and check if the time synchronizes properly.
Restart the Windows Time Service
The Windows Time service is responsible for synchronizing your system clock with Internet time servers. Restarting it can fix any temporary glitches.
- Press Windows + R to open the Run dialog box.
- Type services. msc and hit Enter.
- Scroll down and find Windows Time.
- Right-click it and select Restart.
- After restarting, right-click again, choose Properties, and make sure the Startup type is set to Automatic.
Synchronize Time Manually
If automatic synchronization fails, you can manually sync the time through the Control Panel.
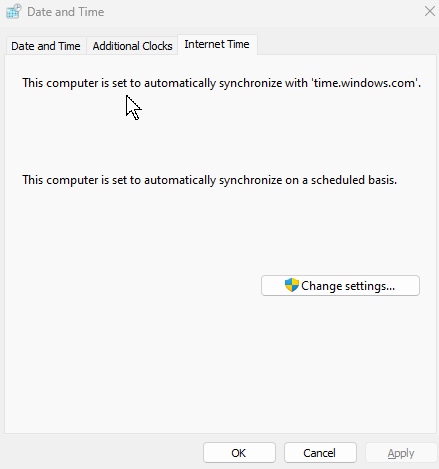
- Open Control Panel and navigate to Clock and Region > Date and Time.
- Click on Internet Time and then select Change settings.
- Check the box next to Synchronize with an Internet time server.
- Choose a time server from the dropdown, such as time.windows.com, and click Update now.
Check Your Network Connection
An unstable or disconnected network can prevent your PC from synchronizing with time servers. Ensure you have a stable internet connection by checking your Wi-Fi or Ethernet status.
- Open Settings and navigate to Network & Internet.
- Make sure your system is connected to the internet and troubleshoot any connectivity issues.
Update System Drivers
Outdated system drivers, especially network drivers, can affect time synchronization. Updating these drivers may solve the issue.
- Open Device Manager (press Windows + X and select Device Manager).
- Expand the Network adapters section.
- Right-click on your network adapter and choose Update driver.
- Follow the on-screen instructions to complete the Update.
Alternatively, you can use a third-party PC solution like Fortect, which has a built-in driver updater. Fortect automatically scans all installed drivers, identifies outdated or faulty ones—such as system drivers causing the Time Synchronization Failure—and updates them as needed.
Once obsolete drivers are detected, Fortect will fix them while optimizing your Windows PC for better performance.
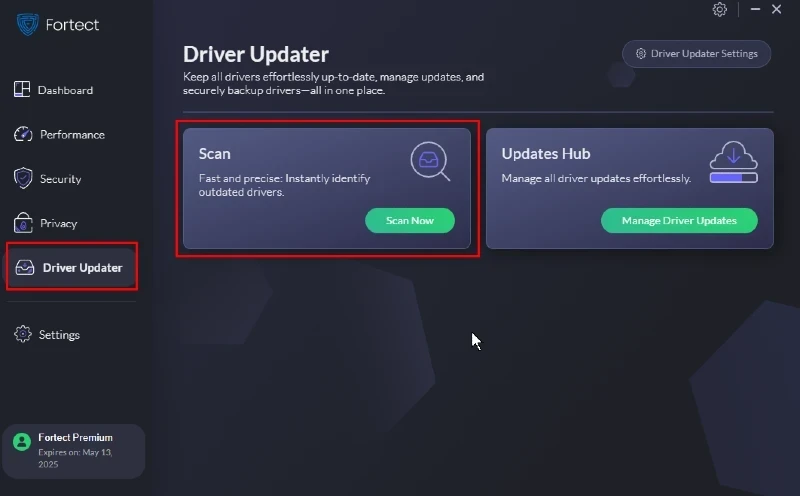
Download and install Fortect now.
Check for Corrupted System Files
Corrupted system files can interfere with the time synchronization process. Using the System File Checker (SFC) tool can help repair these files.
- Open Command Prompt as an administrator (press Windows + X and select Command Prompt (Admin)).
- Type sfc /scannow and press Enter.
- Wait for the scan to complete and follow any on-screen instructions if corrupted files are found.
Re-register the Windows Time Service
If the issue persists, re-registering the Windows Time service using Command Prompt may help.
- Open Command Prompt as an administrator.
- Type the following commands one by one, pressing Enter after each:
- net stop w32time
- w32tm /unregister
- w32tm /Register
- net start w32time
Restart your computer and check if the time synchronization is fixed.
Use a Third-Party Time Sync Tool
If the built-in Windows time synchronization still doesn’t work, you can use third-party tools like NetTime or Atomic Clock Sync to sync your time manually.
Final Thoughts
Fixing the “Time Synchronization Failed” error on Windows is essential for ensuring the smooth operation of your system and avoiding potential issues with online services. By following the steps above, you can address common causes of synchronization failure, from incorrect time zone settings to network issues.
If these solutions don’t resolve the problem, it might be worth considering a system reset or contacting Microsoft support for further assistance.
By optimizing your system settings and network, you should be able to keep your Windows clock in sync without further problems.


