
How to Fix “Windows Resource Protection could not Start the Repair Service” on your Windows 10
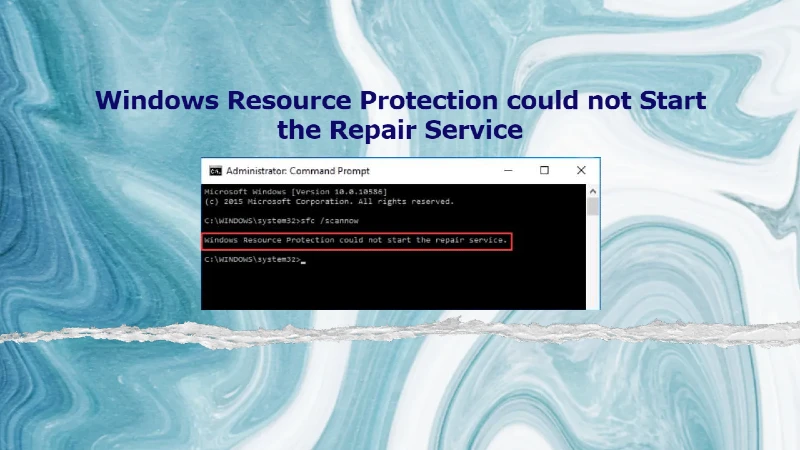
You’re here because you’re getting the error “Windows Resource Protection could not start the repair service” while attempting to execute the System File Checker. Don’t worry; Fortect is here to help with straightforward answers to avoid bothering you further.
We’ll also investigate the potential causes of this error, examine the associated symptoms, and offer step-by-step instructions for troubleshooting and rectifying the situation effectively.
First, let’s examine what a System file checker is.
What is a System File Checker ( SFC )
The System File Checker (SFC) is a handy utility built into Windows that allows users to scan and repair corrupted system files. However, there are instances when the SFC Scannow command fails to execute correctly, displaying the “Windows resource protection could not start the repair service” error.
Other error messages could look like the messages below, but they are the same:
- The SFC Scannow command fails to initiate or complete the scanning and repair process.
- System files may remain corrupted or missing, leading to various issues or instability.
- Error messages or prompts related to the failure of the SFC utility may appear.
We’ll also investigate the potential causes of this error, examine the associated symptoms, and offer step-by-step instructions for troubleshooting and rectifying the situation effectively.
Here are five of the reasons behind the SFC error messages.
Reasons Behind “SFC Scannow command fails to initiate
Several factors can contribute to the occurrence of this error, including but not limited to:
- Corrupted or missing system files are required for the SFC utility to function correctly.
- Insufficient permissions or access rights to run the SFC Scannow command.
- Conflicts with third-party applications or security software that interfere with the SFC process.
- Hardware-related issues, such as faulty RAM or hard disk drives.
- Malware or virus infections may have corrupted system files or interfere with the SFC utility.
Quick Detailed Fix Guide:
- Run the SFC Scannow command in an elevated command prompt with administrative privileges.
- Perform a system file integrity check using the DISM (Deployment Image Servicing and Management) tool.
- Disable third-party antivirus or security software temporarily to eliminate potential conflicts.
- Run the SFC Scannow command safely to bypass any interference from running processes or services.
- To resolve dependencies, use the System File Checker (SFC) and Deployment Image Servicing and Management (DISM) tools in the correct order.
- Perform a clean boot to isolate and identify any conflicting applications or services.
- If applicable, check for and replace faulty hardware components, such as RAM or hard disk drives.
Let’s dig deeper into why we are getting this error message: Windows Resource Protection could not Start the Repair Service.”
Fix Now: Windows Resource Protection could not Start the Repair Service”
Step 1: Enable and start Windows Modules Installer Service (TrustedInstaller)
Ensure that the Windows Modules Installer Service, or TrustedInstaller, is enabled and running. This service manages and installs system updates and plays a crucial role in adequately functioning the SFC utility.
To enable and start the Windows Modules Installer Service, follow these steps:
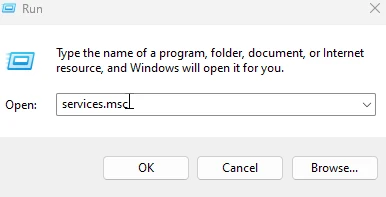
- Press the Windows key + R to open the Run dialog box.
- Type “services.msc” (without quotes) and press Enter. This will open the Services management console.
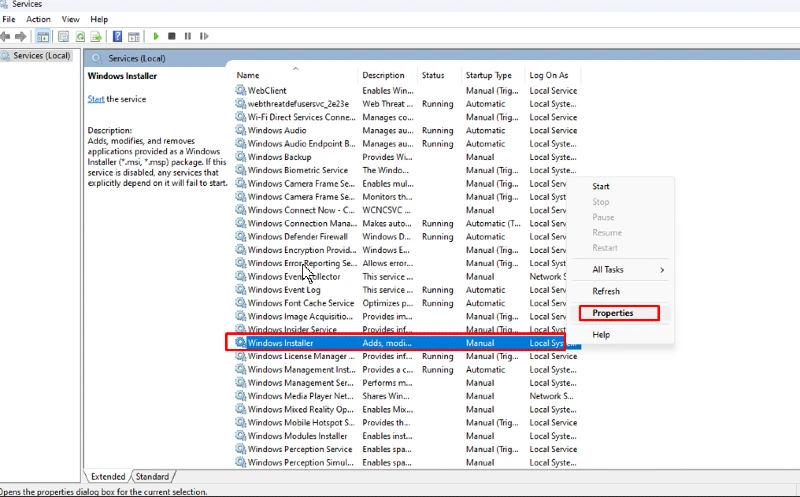
- In the Services window, locate the “Trusted Installer” or “Windows Installer” service.
- If the service is not running, right-click on it and select “Start.”
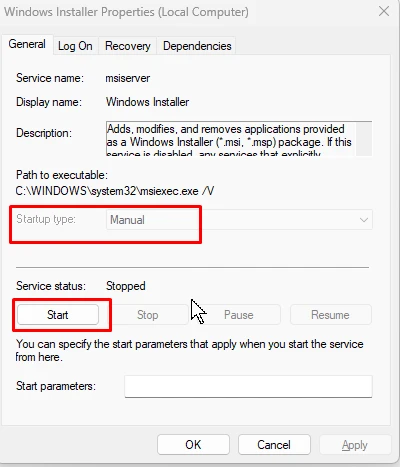
- If the service is disabled, right-click on it and select “Properties.”
- In the Properties window, set the “Startup type” to “Manual,” then click on Start
- Click “Apply” and then “OK” to save the changes.
- Restart your computer for the changes to take effect.
- After completing these steps, the Windows Modules Installer Service should be enabled and running, potentially resolving the issue that prevented the System File Checker from starting the repair service.
- Once the service is active, you can try running the “sfc /scannow” command again to scan and repair any corrupted system files.
It’s important to note that if the TrustedInstaller service was disabled or not running for a specific reason, addressing that underlying issue may also be necessary to prevent the problem from recurring.
Step 2: sc config trustedinstaller start= auto Command
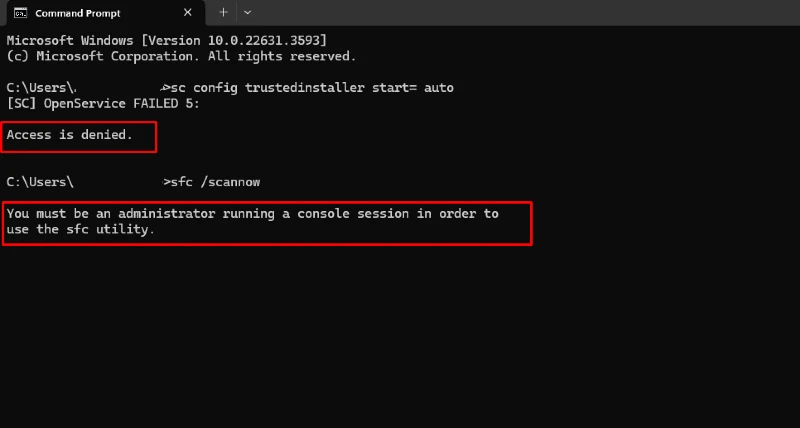
This approach is similar to the first step, which uses a command prompt. It may resolve the issue if it’s simple, provided you’re the administrator or owner of your computer. Mind you, sometimes, even if you’re the owner of the computer, you may not be the administrator, and you’ll receive an error such as t”his: You must be an administrator running a console session to
use the SFC utility.” or “Access is denied.”
If this is the case, contact your IT or system administrator or the one who set up your computer.
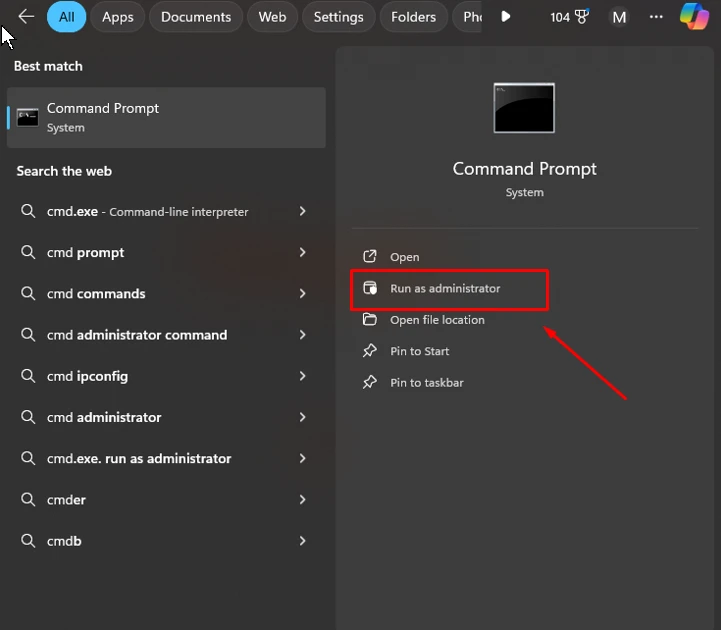
- Type cmd in the search bar near the Start button on your computer.
- On the right side of the screen, select Run as Administrator.
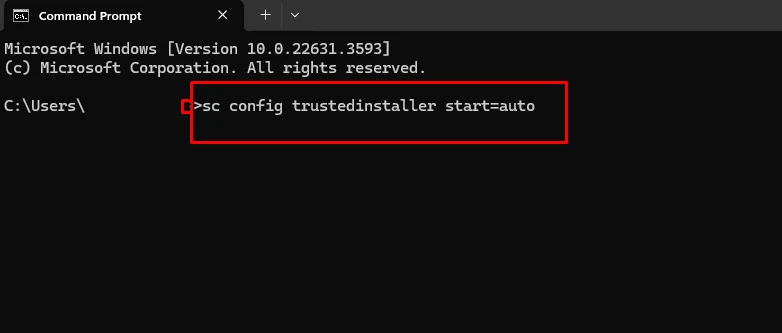
- A black window should appear; type sc config trusted installer start=auto in the C: section next to the user’s name. then ENTER
- You should receive a SUCCESS message below your command if everything works correctly.
- A message should say something like: Windows Modules Installer service was started successfully.
- Then, on the C: user section below that message, type sfc/scannow to check if it’s successfully running.
Step 3: Run SFC in Safe Mode
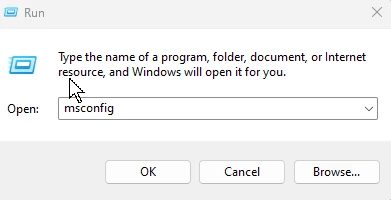
- Press the Windows key + R to open the Run dialog box. Or type run in the search bar near the start button.
- Type “msconfig” and press Enter to open the System Configuration utility.
- In the System Configuration window, navigate to the “Boot” tab.
- Under the “Boot options” section, check the “Safe boot” checkbox.
- Click “OK” to apply the changes and restart your computer in Safe Mode.
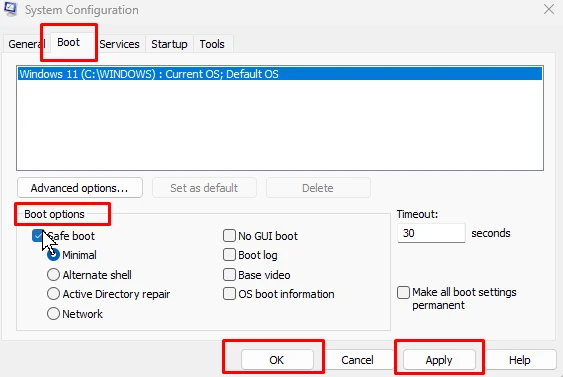
- Once in Safe Mode, open an elevated Command Prompt and run the “sfc /scannow” command.
- After the scan completes, restart your computer normally.
Step 4: Run the DISM Command
- Press the Windows key + R to open the Run dialog box.
- Type “cmd” and press Ctrl + Shift + Enter to open an elevated Command Prompt.
- In the Command Prompt window, type the following command and press Enter:
- DISM /Online /Cleanup-Image /RestoreHealth
- This command utilizes the Deployment Image Servicing and Management (DISM) tool to repair corrupted system files.
- Wait for the process to complete, as it may take some time, depending on your system.
Step 5: Install Windows Update
- Press the Windows key + R to open the Run dialog box.
- Type “control update” and press Enter to open the Windows Update settings.
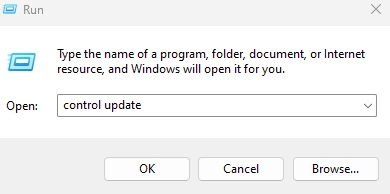
- Click “Check for updates” and install any available updates. If your Windows is up to date, then proceed with other steps.
- Restart your computer after the updates are installed.
By following these detailed steps, you should be able to resolve the “Windows Resource Protection could not start the repair service” error and successfully run the System File Checker (SFC) utility.
How to Resolve Issues When the SFC /Scannow Command Fails?
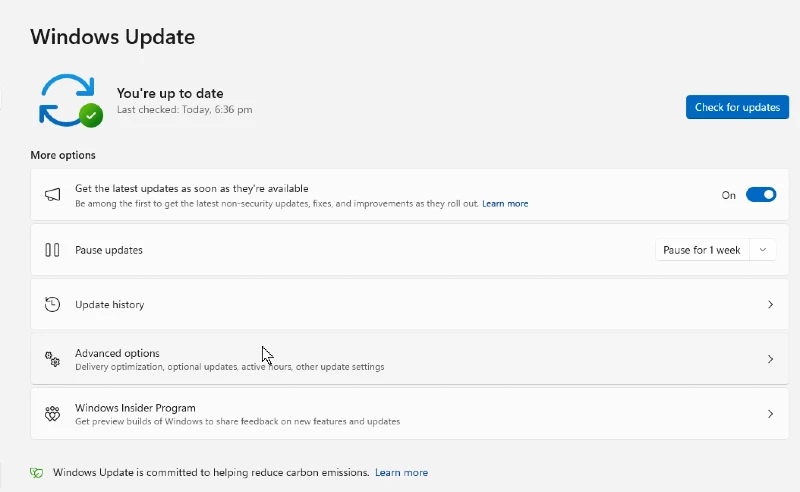
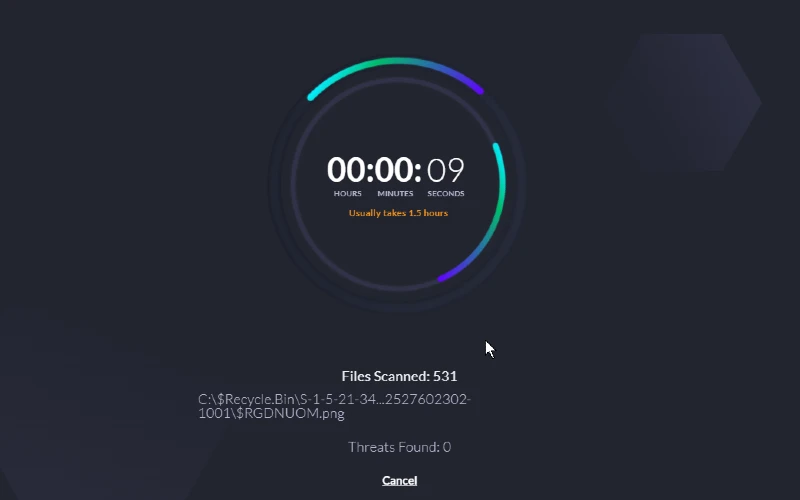
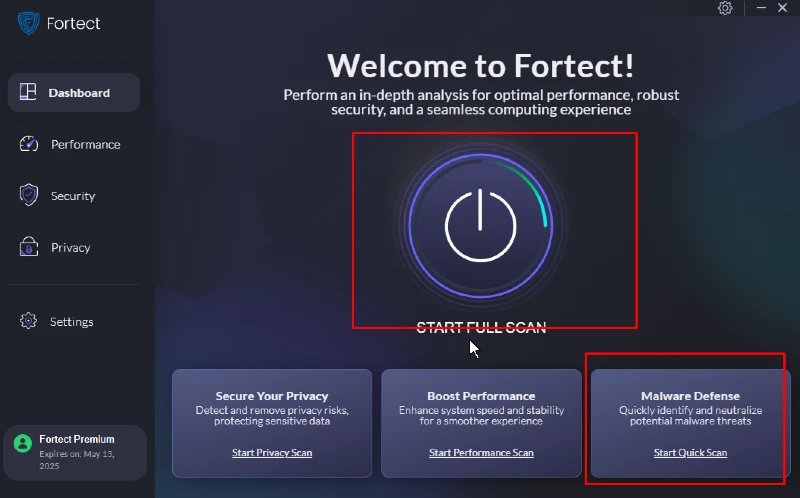
While the steps outlined above can help resolve the “Windows Resource Protection could not start the repair service” error, having a reliable tool like Fortect is essential.
Fortect offers an advanced repair solution for premium users. When a user runs a full system scan and clicks “Start Repair” after the Scan Now button, Fortect executes the standard System File Checker (SFC) scan and applies other advanced fixes.
Its premium repair feature utilizes advanced operating system repair and restoration algorithms to thoroughly diagnose and resolve issues on the user’s system.
This thorough repair goes beyond the SFC scan to provide a deeper repair and optimization for the user’s operating system and files.
Fortect offers a thorough solution that goes beyond just scanning and protecting. Its advanced repair algorithms address corrupted files caused by malware or viruses. Again, this feature is only available for premium users.
If a malware attack causes the issue, Fortect can help with its malware defense capabilities. It monitors and protects downloads, installations, and executables from malware and viruses whenever you install something on your system. Its real-time scanning and detection mechanisms can identify and block malicious files or activities, preventing them from causing further damage or corruption to your files and operating system.
Act now before it’s too late. Download and install the Fortect software today, enabling hassle-free browsing and secure online activities.
Conclusion
The “Windows Resource Protection could not start the repair service” error can be frustrating but not impossible. By following the various methods outlined, such as enabling and starting the TrustedInstaller service, running SFC in Safe Mode, utilizing the DISM command, and ensuring up-to-date Windows updates, you can resolve this issue and successfully execute the System File Checker.
In some cases, addressing hardware-related problems or repairing hard drives may also be necessary. With persistence and the right approach, you can restore the functionality of this essential system utility.


