
How To Run a Full Windows Repair
When your PC stops working properly and Windows errors begin to show, there may be several problems behind the scenes that need to be repaired.
These might include:
- Corrupted Windows system files or missing DLLs.
- Software or system-wide crashes.
- Blue screen of death (BSoD) and boot failure.
- Significantly slower performance.
- Windows registry problems.
- Malware and viruses.
- Windows Update errors.
To fix all these PC errors, you can use built-in utilities or third-party Windows repair tools, which often combine many of the same features.
How do I fix all Windows errors at once?
Although there are some maintenance tasks you can perform regularly to tune up your PC, repairs should be made only when you notice a problem.
Let’s take a closer look at Windows’ main repair utilities and how you can use other software to make fixing your system even easier:
1. Rule out hardware issues
First, before repairing Windows, you must rule out hardware failure as a cause.

- Open your computer tower and ensure all components are seated correctly (if you don’t void any warranty).
- Type memory in the Windows Search bar and run Windows Memory Diagnostic.
- Use a tool like Fortect to check core temperatures.

If there are problems with your hardware, you should aim to replace it as soon as possible to prevent further damage and data loss. Repairing Windows with malfunctioning hardware will lead to further errors that will resurface later.
In case your hardware works fine, that means Windows itself is damaged and must be fixed. The first step is to use Command Prompt.
2. Command Prompt fixes
One of the best weapons in your arsenal is Command Prompt. This requires no graphical interface and lets you dig deep into the system to fix errors using typed commands.
You can launch the Command Prompt before booting Windows to fix even the most damaged PCs. It also runs in Safe Mode. However, if you can still boot normally, all you need to do is type cmd into the Windows Search bar and select the Command Prompt app. Choose Run as administrator if you are on a secondary user account.
System File Checker – This tool scans your system files for errors or corruption and tries to repair them automatically using backups of the original system files. Simply type the command sfc /scannow
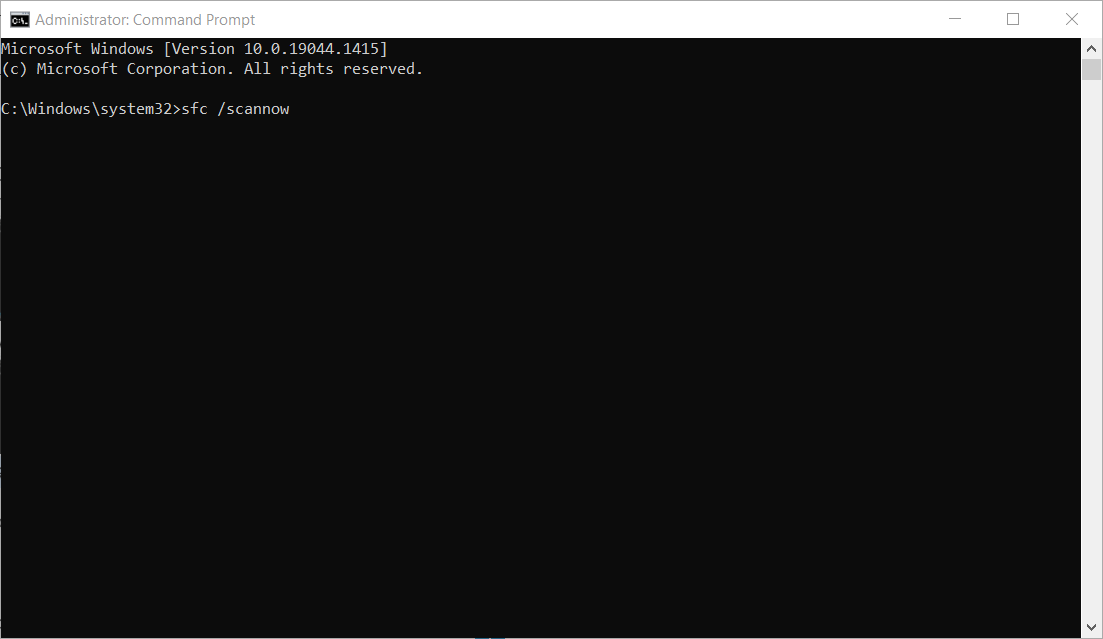
The process can take several minutes to complete and will usually restart your PC.
DISM – The Deployment Image Servicing and Management tool can repair corrupted system files, as well as fix issues with Windows Update. To run it, type the following command: dism /online /cleanup-image /restorehealth
Upon completion, your PC may automatically restart.
Check Disk – CHKDSK scans your physical hard drive for errors and repairs them if possible. It can fix errors related to bad sectors, the file system, and other issues that may cause data loss or system instability.
Type chkdsk /f c:, where c is the drive letter of the drive you want to check.
Note: CHKDSK can work around minor hard drive damage, but if the drive is old or malfunctioning, it may soon need to be replaced. The best approach is to repair the disk and then make a backup before anything else goes wrong.
3. Use Fortect
Fortect takes many of the tools already available in Windows and improves on them. Its most powerful feature is the ability to scan and repair system files using the most recent versions from its online database rather than reverting to the base versions. It can also:
- Automatically replace missing DLLs.
- Automatically fix the Windows Registry.
- Remove junk files that might be clogging up your hard drive.
- Detect potentially unwanted applications (PUA).
- Repair malware and virus damage.
Fortect is available on Windows Vista, 7, 8, 8.1, 10, and 11, and can be used in Safe Mode when Windows cannot boot normally.
Here’s how to use the software:
- Download and Install Fortect on your PC.

- Upon first launching, it will request a system scan. Accept this and it will take no longer than 5 minutes.
- Fortect updates you on its progress and begins to categorize Windows problems on the left.
- Once complete, you get a summary of problems and can browse each category for further details.
- Click View & Fix for more information about an individual problem, then the Fix section to repair just that problem.
- Alternatively, click Fix all sections or Start Repair, to fix all Windows errors after product activation.


Depending on the severity of the damage, the repair process can take anywhere from a few minutes up to 30 minutes. During this time, Fortect may download missing or damaged system files and automatically install them.
It may also need to restart your computer to complete the process.
Once you have done a full Windows repair, you should run Fortect every week or so to keep your system tuned up and running smoothly.
4. Perform updates
Over time, failing to update software and drivers can cause conflicts in Windows that lead to bigger problems that need to be repaired. It’s therefore important to update everything as soon as possible.
Windows Update – Try not to delay Windows automatic updates or prevent your PC from restarting to complete the process. This can cause conflicts and leave you vulnerable to security threats.
Software updates – Software you use regularly will often prompt you to update, but if not, you should manually check for updates every couple of months to ensure your system runs smoothly.
Driver updates – Outdated drivers can lead to system instability, odd software behavior, and full-blown crashes. Modern hardware components often have a software utility that lets you easily update drivers. I.e., GeForce Experience for Nvidia graphics cards.
However, if such a utility isn’t available, the manufacturer’s website should have a database of drivers you can search and download.
To install a driver without an executable, you can use the Windows Device Manager.

- Type Device Manager into the Windows Search bar and open the app.
- Scroll down the list and find the hardware component.
- Right-click and choose Update driver.
- Follow the wizard to find and install the driver.
Virus Definitions – Make sure your antivirus is using the latest definitions, in case new threats infect your computer and damage Windows.
5. Use a Restore Point
System Restore is a feature available on Windows XP through Windows 11, which lets you roll back the system to a previous state when everything was working OK. This can be helpful if problems have occurred suddenly after changes were made to the system.
In most versions of Windows, System Restore is enabled by default and automatically creates restore points periodically or before significant system changes, such as installing new software or drivers.
You can also set your own update schedule by typing Restore into the Windows Search bar and opening Create a restore point.
If you wish to roll back to a previous state because Windows is broken, follow these steps:
- Open Create a restore point.
- Click on the System Restore button within the properties window.
- Click Next on the first screen to see a list of available restore points.

- Select the restore point you want to use and click Next.
- Review the details of the restore point to make sure it’s the one you want to use, and then click Finish.
- Wait for the restore process to complete. Your computer will automatically restart once the process is finished.

Note: A restore point will erase any system settings or updates that have occurred since that point, but will maintain personal files.
6. System Image Recovery
If you have created a system image backup, you can use it to restore your PC to a previous state. This will bring back your system to the exact state it was in when you created the backup, including all personal files. I.e., any new files you haven’t backed up will disappear.

To create a system image in case of an emergency, follow these steps:
- Type Control Panel into the Windows search bar and open the app.
- Under System and Security select Back up and Restore. Although it says Windows 7, it still works for Windows 10 and 11.
- Click Create a system image on the left and choose a hard drive location or DVD.
- Follow the prompts to complete the process.
Here’s how to recover Windows with a System Image you’ve already made:
- Make sure your system image backup drive or disc is inserted.
- Type Control Panel into the Windows search bar and open the app.
- Under System and Security select Back up and Restore.
- Select the correct system image from the list.
- Follow the prompts to complete the process.
If Windows won’t boot, you can access System Image Recovery from the Advanced Boot Options.
7. Refresh or reset Windows
If none of the above methods work, you can try to refresh or fully reset Windows. A refresh keeps your files and settings but reinstalls Windows and all the base apps. A reset removes everything from the hard drive and gives you a clean slate.
Here’s how to perform either process:
- Go to Settings, select Update & Security, then choose Recovery.
- Under Reset this PC, click on Get started.
- Select Keep my files to refresh Windows while keeping your personal files or Remove everything to start fresh without keeping any files and completely reset Windows.
- If you selected Keep my files, you’ll have the option to choose which apps to keep or remove. Follow the on-screen prompts to make your selections.
- Click on Next and then Reset to begin the refresh process.
- The refresh process may take some time to complete, depending on the speed of your computer and the amount of data being transferred.
- Once the refresh process is complete, your computer will restart, and you’ll be able to log in and use your refreshed Windows installation.

Note: While your personal files and some apps will be retained during the refresh process, any installed desktop apps or drivers will need to be reinstalled. Additionally, any changes made to system settings or configurations will be reset to their default values, so you’ll need to configure these again after the refresh process is complete.
8. Run Startup Repair
Sometimes Windows is damaged to such a degree that it cannot boot as normal. You may notice a recovery screen or a constant restart loop.
If you’re stuck in a loop, press and hold the F8 key before the Windows logo would usually appear to open Advanced Boot Options.

From here, choose the Startup Repair option. This built-in Windows tool will automatically attempt to fix system files and settings that prevent your computer from starting.
You may face one more restart before booting as normal. Once you are back on the desktop, you can run further built-in repair utilities or software like Fortect.
How do I force Windows Repair?
To force an automatic Windows Repair, you can try the following steps:
- Turn on your computer and wait for the Windows logo to appear. Press and hold the power button to force a shutdown while Windows is loading.
- Repeat step 1 two or three times until you see the Preparing Automatic Repair screen.
- Once you see this screen, wait for Windows to diagnose the problem. It may take a few minutes.
It’s important to note that forcing Windows Repair may not always solve your computer issues, and in some cases, it may cause data loss or other problems. Therefore, it’s always a good idea to back up your important files and data before attempting any repairs.
What do I do if Windows Startup Repair doesn’t work?
If Startup Repair doesn’t allow your computer to boot as normal, you will be back in a restart loop or the recovery area, where you’ll find the Advanced Boot Options.
Here you can try most of the other fixes by choosing the Command Prompt and running commands for the System File Checker, DISM, and Check Disk. You can also access a Restore Point or System Image from this area.
Safe Mode and Fortect – Another option is to boot in Safe Mode, which starts Windows with only the most basic processes and services. This can bypass many errors and get you back to the desktop.
From here you can run Fortect, repair Windows, and then reboot as normal.
Reinstall Windows – The last resort is to wipe your hard drive and reinstall Windows from scratch. However, 99% of users will not have to do this and there isn’t much benefit if the other repair methods work for you.
Nonetheless, to reinstall Windows you will need the original installation disc or to create a bootable drive with the installation files. More on this from Miscorsoft.com.
- If possible, backup any personal files you wish to restore later.
- Insert the installation media or connect the USB drive to your computer and restart your computer.
- Press the appropriate key to enter the boot menu during startup (usually F2, F10, F12, or ESC) and select the installation media or USB drive as the boot device.
- Follow the on-screen prompts to begin the Windows installation process.
- Enter your product key or skip this step if you don’t have a product key and plan to activate Windows later.
- Accept the license terms and select the type of installation you want to perform (e.g., Custom, Upgrade, or Clean Install).
- If you selected Custom or Clean Install, you’ll need to choose a partition or drive on which to install Windows and format it if necessary.
- Wait for the installation process to complete, which may take some time depending on the speed of your computer and the size of the installation files.
- Once the installation is complete, follow the on-screen prompts to configure your settings, including language preferences, time zone, keyboard layout, and user account settings.
- Install any necessary drivers, software, and updates to ensure your computer is up-to-date and functioning properly.
Conclusion
It’s not always clear how to fully repair Windows when problems start to emerge, and hardware isn’t the cause. However, if you follow the above steps and use a tool like Fortect, you can be sure all fixes are applied for whatever the situation.


![What Causes Windows Errors? [Most Common Problems]](https://wp-cdn.fortect.com/uploads/2023/04/12131234/common-windows-errors-425x300.jpg)