Ways to Fix Live Tiles Not Working in Windows 10/11
Live Tiles are one of the most iconic features of the Windows Start Menu, providing dynamic and real-time updates from your apps. However, many users experience Live Tiles not updating or working correctly in Windows 10 and 11.
If you’re facing this problem, don’t worry—this guide will walk you through various troubleshooting steps to fix Live Tiles on your Windows PC.
Why Live Tiles Aren’t Working in Windows 10/11
Live Tiles may not work correctly for various reasons, including system glitches, corrupted Windows Store cache, app issues, or outdated settings. These problems can affect the tile updates, preventing you from seeing live information like news, weather, or calendar events. Fortunately, several ways exist to fix this issue and get your Live Tiles working again.
SOLVED: Ways to Fix Live Tiles Not Working in Windows 10/11
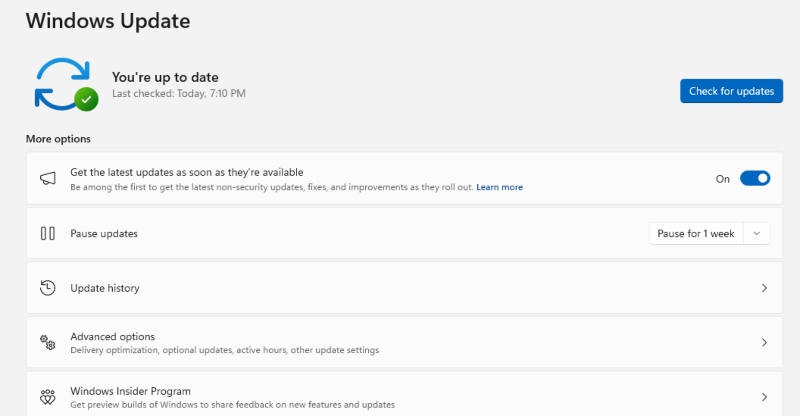
Check Windows Update Settings
Outdated system files and settings can interfere with Live Tiles’ proper functioning. Keeping your Windows operating system updated is crucial for resolving compatibility issues and ensuring your System runs smoothly.

Step-by-step:
- Press Windows + I to open Settings.
- Navigate to Update & Security > Windows Update.
- Click Check for updates to see if any updates are available.
- Install the updates and restart your computer if necessary to ensure all changes take effect.
Ensure Background Apps Are Allowed to Run
Live Tiles rely on background apps to fetch updates. If background apps are disabled, Live Tiles may not function correctly. Enabling background apps will allow your tiles to receive real-time updates.
Step-by-step:
- Open Settings by pressing Windows + I.
- Go to Privacy > Background apps.
- Toggle the switch to On for the apps you want to allow to run in the background.
- Restart your computer and check if the Live Tiles start updating again.
Reset or Reinstall the Affected App
Sometimes, the issue may be isolated to a specific app associated with the Live Tile. Resetting or reinstalling the app can fix any corruption or glitches affecting the Live Tile feature.
Step-by-step:
- Go to Settings > Apps > Apps & Features.
- Find the app whose Live Tile is not updating and click on it.
- Select Advanced options, then click Reset to reset the app’s settings.
- Alternatively, uninstall and reinstall the app from the Microsoft Store to ensure a fresh start.
Rebuild the Tile Database
If your Live Tiles are still not working, the problem could be related to a corrupted tile database. Rebuilding the tile database can restore Live Tiles’ Windows 10 and 11 functionality.

Step-by-step:
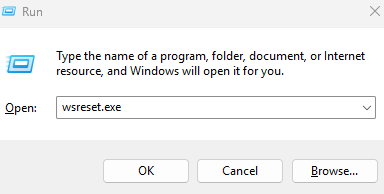
- Press Windows + R to open the Run dialog box.
- Type wsreset.exe and press Enter.
- This will reset the Windows Store cache, which can help resolve tile issues. Once the process is complete, check if your Live Tiles are working again.
Clear the Store Cache
A corrupted Windows Store cache may also cause Live Tiles to malfunction. Clearing the cache can solve this problem and restore your tiles’ functionality.
Step-by-step:
- Press Windows + R to open the Run dialog box.
- Type wsreset.exe and hit Enter.
- This command will automatically clear the Windows Store cache and reset any related issues.
- After the process, complete Live Tiles to see if they are updating.
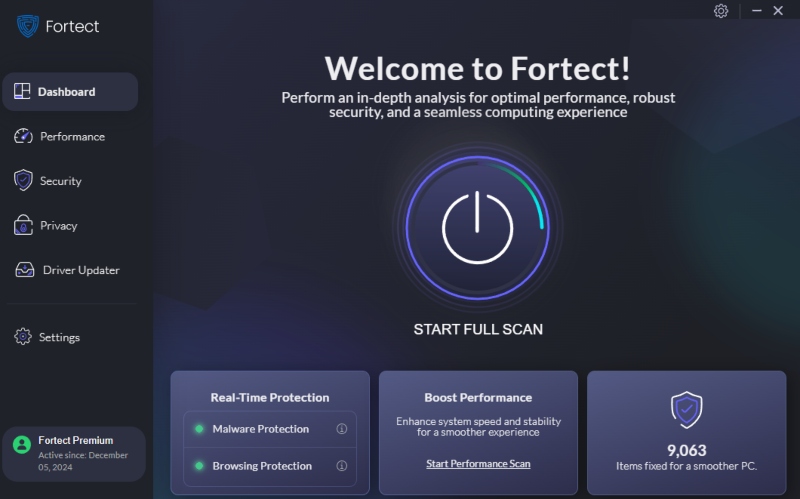
I recommend using a dedicated Windows repair tool like Fortect to fix a corrupted Windows store cache, which can cause live tiles to stop working in Windows 10/11. Malware can also affect Windows and lead to system instability. Fortect is fast and effective, providing real-time malware protection and automatic scanning that can be completed in just a few minutes, helping to optimize your PC’s performance.

Download and install Fortect today.
Turn Off and On Live Tiles
If you’re still facing problems, turning off and on the Live Tiles can help refresh the feature and get it working again. This simple step can sometimes resolve minor glitches and restore functionality.
Step-by-step:
- Right-click on the Live Tile in the Start Menu.
- Select Turn Live Tile Off from the options.
- Wait a few moments and right-click again to select Turn Live Tile On.
- This should refresh the Live Tile and restore its functionality.
Perform a System Restore
Restoring the System can help fix Live Tile issues if all else fails. This will restore your System to a previous working state before the problem began, ensuring the settings and system files are in order.
Step-by-step:
- Type Create a restore point in the Windows search bar and select it.
- Click the System Restore button and choose a restore point before the issue starts.
- Follow the on-screen instructions to complete the restore process and restart your System.
Conclusion
If Live Tiles aren’t working in Windows 10 or 11, it’s often due to issues with updates, settings, or app configurations. Following the troubleshooting steps outlined in this guide, you can resolve the problem and update your tiles. Keep your System up to date, allow background apps to run, and reset or reinstall apps as needed to restore the full functionality of Live Tiles.


